Using L2TP/IPSec with Linux, installation är gjord med Xubuntu.
1. Börja med att lägga till repository för GUI och installera programvaran.
sudo apt-add-repository ppa:werner-jaeger/ppa-werner-vpn
sudo apt-get update
sudo apt-get install l2tp-ipsec-vpn
sudo reboot
Om du använder Ubuntu med fönster hanteraren Unity, behöver du ange följande i ett terminalfönster:
sudo gsettings set com.canonical.Unity.Panel systray-whitelist “['all']“
The gsettings line makes the L2TP/IPSec applet icon show in the System Tray. You’ll find more information hit.
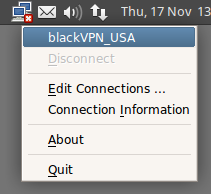
2. When your computer has rebooted you will find a new icon in your menu bar.
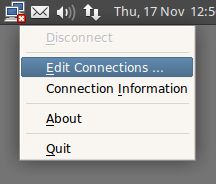
Click on the new icon and select ‘Edit Connections’.
3. You will be asked for your password.
4. Click on add to start setting up the connection.
5. Enter a name for the connection.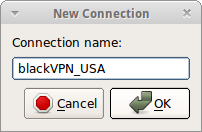
6. Klicka på Redigera och ange fjärrserverns adress och i förväg delad nyckel: blackvpn
| Canada: | ca.vpn.blackvpn.com |
| Estonia: | vpn.blackvpn.ee |
| Litauen: | vpn.blackvpn.lt |
| Luxembourg: | vpn.blackvpn.lu |
| Netherlands: | vpn.blackvpn.nl |
| Panama: | vpn.blackvpn.com.pa |
| Russia: | vpn.blackvpn.ru |
| Switzerland: | vpn.blackvpn.ch |
| Ukraine: | vpn.blackvpn.com.ua |
| Singapore: | vpn.blackvpn.sg |
| UK: | vpn.blackvpn.co.uk |
| USA East: | eastcoast.vpn.blackvpn.com |
| USA West: | westcoast.vpn.blackvpn.com |

7. Go to the L2TP tab and select the tick box ‘Length bit’
8. Go to the PPP tab and click on ‘Allow these Protocols’ tillåt endast MS-CHAPv2.
Ange även ditt användarnamn & password.
9. Then click on ‘IP settings’ and select ‘Obtain DNS server addresses automatically’.
10. Click OK, sedan på OK och sedan på Stäng och sedan kan du välja VPN i övre meny på skärmen och du ska nu kunna ansluta.